And coming fast... I need to get out in the garden this week and get things ready for the Fall planting asap. I've already started, but it needs to be finished.
I've found the seeds though, so that's good. I've got all the greens, broccoli, cauliflower and Brussels sprouts we need. I'm going to need to get some peas, maybe, and sweet onion sets if I can find them... They're hard to find around here for some reason. Garlic and shallots too, also if I can find them.
I'm sure there are some other things that we need that I'm forgetting, but it's all on my other computer and my monitor is still dead (can't remember if I had said, it was killed by lightning during a storm - the computer and all the other equipment were unaffected though. If I had to loose something, I'm glad it was the monitor).
I'm working on Urchin. It's almost done. Just need to seam it up and weave in the ends. I think I might dye it with indigo. I've never done bamboo with indigo. Will be interesting. But then again, I might leave it undyed because it does look good as is. But white shows dirt so easily, so I'll probably dye it after all... I definitely need a pin or brooch or something for it though. It's like that...
I need to start taking stock for presents for the holidays. I've got a lot of stuff saved up. And I've got cotton yarn from those KnitPicks samplers still. Lots of easy, quick, little presents to make from that stuff. Really, awesome investment. I know Stacey has said she wants a felted bag. Check. I want to make some more felted bags. They're so easy and quick too. Three days and it's completely finished, felted and dried. Awesome!
For myself this fall, I want to make a Tied Danish Shawl. I found a group on Ravelry where they do KALs of shawls that are inspired by the races of Tolkien's books. The tied Danish Shawls make me think of the hobbits. Seriously, the shawls are simple, very practical and made to be worn while working, but at the same time, the stripes and bright colors make them cheerful as well, and they just make me think of Hobbiton and hobbit children running through green fields. I think I want to use the pretty green skein of wool that Ilana sent me for part of it. I need to see what else in my handspun stash will go with it.
I also want to spin some new stuff and dye it with the onion skins and marigolds I've been saving up. If I do, I might use that for the shawl too. In any case, I'm really excited about the project.
Showing posts with label dyeing. Show all posts
Showing posts with label dyeing. Show all posts
Monday, September 22, 2008
Monday, January 28, 2008
Blue Like Painted Gauls...
(I've been translating Caesar's "De Bello Gallico" for the last week...) :D
So the indigo adventures continue...
I took the pot out when I got home from class and the coppery film on the surface is less than it was, but the liquid beneath the surface is still yellowish-green, so it's still working. I'm not sure exactly what the coppery film is supposed to indicate other than it is initially ready to dye, and I have no clue if it's normal for it to go away with use.
I re-dipped the cotton that I did yesterday, to see if it would get darker. It didn't really, being pretty dark to begin with...
See, this is what it looked like dry after one dipping:

Then I did the wool pokeberry errors. One skein I had tried to overdye last week with food coloring, and another that was just messed up pokeberry. The one that I tried to overdye with food coloring turned a dark teal, and the one that was just pokeberry turned a dark, forest-like green. I was expecting maybe purple, but perhaps because the red/pink of the pokeberry is not permenent and actually washes out to a yellow-orange-brown kind of color that would explain the greens I got... I dunno. But they are a marked improvement on the nasty, uneven colors they were before.
 The skein on the left is the one that was just pokeberry. The one on the right was pokeberry overdyed with food coloring...
No matter what I did with the wool, no matter how saturated it was with water before it went in and no matter how many times I tried to push it down into the dye bath, it would always come back to the top and it seemed it was quite happy to just sit there...

Then I tried one skein of white wool. And I got a pretty middle kind of blue.
These are the rest of the photos I got of the yarn I dyed today. From left to right in each photo, they are the pokeberry, the pokeberry overdyed with food coloring, the kitchen cotton, and the plain white wool:


Oh! I should note a few things about what I've learned from dyeing with indigo in the last couple of days.
1.) You have to wet the fibers first to get a more even color saturation and also to reduce the amount of oxygen that is put into the dyepot.
2.) No matter how wet the fibers are though, you're going to get some air in there.
3.) Even though pre-reduced indigo seems to ferment very quickly, if you're dyeing a lot in one day, it's still better to pull fibers out at an angle and let the dye drip out of the pot. There's a lot of waste when dyeing with indigo - at least it seems so to me - and there's not much to be done about it.
4.) For the above reason, it's better to use this dye method over grass rather than concrete, if you don't want your driveway stained until the indigo eventually washes away.
5.) Dyeing with indigo is a lot easier than a lot of the things written about it would have most people believe. You don't have to keep the pot hot. If you use the Yeast-Ammonia Fermentation Method, you don't have to use anything stronger than regular household ammonia. It's not an exact science... since I messed up calculations royally, and it still seemed to work just fine. It doesn't smell unless you stick your nose in it after the first day or so (at least my dyepot doesn't stink of yeast and ammonia anymore unless I'm sitting right next to it with my face near it). And you get such pretty colors!
I'm really happy with how it's turned out so far... But tomorrow, there will be rinsing... Stay tuned...
Sunday, January 27, 2008
Yet more about the indigo...
Well, it did referment very quickly after being transfered to one of the larger stock-pots and the extra ingredients and water were added. About an hour and the copper film was thick again. This was around 4:30pm today. I took my dye spoon and gently brushed aside some of the foam and I could see that the liquid was a mostly yellow/greenish color.

So yay! I took the pot outside and carefully removed as much of the copper film as I could and introduced the cotton yarn that I wanted to try dyeing.

The instructions said to let it sit for about 20 - 30 minutes, which I did, but I think it can probably be left for a shorter time than that. By the time it was done, it was starting to get dark (blast shorter days in winter!), so the one picture that I got removing the yarn from the dyebath is too dark to really see the color, but I can tell you, it came out a kind of dark green and very quickly started turning dark blue.

I squeezed out the excess carefully with rubber-gloved hands and set the yarn aside on the grass (I didn't have anywhere to hang it). I put the copper foam back onto the top of the indigo, stirred carefully and recovered the pot with the lid. When I came back outside after taking the pot back into my craft room, the yarn was totally blue. I have it hanging to dry in the extra bathroom shower now. It's a very dark, even-looking, navy blue.

Tomorrow afternoon, I'm going to dye some wool. I'll try to do it earlier in the day if possible so the pictures will be a little better...
Okay... so here's what I did for this dyebath, in case anyone might want to try this out themselves:
4 tbsp pre-reduced indigo (you can, and probably should, use less than that... like maybe 2 tbsp to start with, but that's how much I used), mixed with 2 cups of *non-sudsing* clear ammonia. (I used a large mason jar, but you can probably do this in a dyepot if you like... you're going to need a large dyepot of at least 4-gallons.)
2 packages of yeast with roughly 2 tbsp of sugar stirred into about 1 - 2 cups of warm water (about 100 degrees). This is to activate the yeast and get it working.
After 1 or 2 hours of letting all that sit, mix the yeast with the indigo/ammonia in the dyepot and fill the pot with approximately 3.5 gallons of water, or until there is only about 1.5-2 inches of headspace at the top of the pot.
Stir gently to combine all this stuff and a copper film will probably rise to the top pretty quickly. Let it sit for a little while. Some instructions said as little as 10 minutes are needed, others said overnight. I waited a little more than an hour and it was fine.
After dyeing, if the liquid looks more blue than yellow-green, it needs to sit a while to get the oxygen out again.
Saturday, January 26, 2008
Indigo update...
Well, I checked the vat about an hour ago. There's copper colored, bubbly film on the surface. I thought this very strange because that's listed as one of the signs that the vat is ready to dye things. I stuck a string of cotton in, left it for a minute and pulled it out. And indeed, it appears to have dyed it. It was green and then very quickly turned blue. I rinsed it and the cotton is now a dark blue and the color won't wash out. Very strange.
So I did some research. It seems I got "Pre-Reduced Indigo" from EarthGuild (apparently, some people also call it "Instant Indigo" and soon you'll see why). The lady on the phone had told me it's the exact same thing as natural indigo, but it isn't. It works much faster and less indigo must be used, kinda like using "Ultra Concentrated Detergent" to wash your clothes. The same size bottle will often wash twice as many full loads of laundry... So I have a problem and a blessing. Blessing first: the indigo will only take about 10 minutes from mixing the chemicals to fermentation when normally it takes a week with natural, unreduced indigo. The problem, however, is that there is far too much indigo in my vat. It will stick and cake on fibers and rub off quickly. One set of instructions for working with pre-reduced indigo says to use 1 tablespoon of indigo per 5 - 6 gallons of water, but others say as little as 1 tablespoon of pre-reduced indigo to 1.5 gallons of water. yet others say 1 1/2 tablespoons to 3 - 5 Liters of water. Obviously, it not an exact science. Still, I have 4 tablespoons in my one gallon container. You can see how this is a problem.
Lucky for me, I have two 4-gallon dye pots. Not sure if the 8 gallons, plus one gallon glass crock will be enough, but I'm going to do the calculations and try.
So obviously, I need to transfer it to the larger pots, add more sugar, yeast, ammonia and water. And then see if it ferments properly again so that the indigo isn't so great in proportion to the other ingredients. It is, according to the sources, better to have a weak solution than a strong one, because items can be dipped more than once, but once a thing is dipped, nothing but time will remove the excess indigo. So. Tomorrow, I'll do some calculations and figure out how much ammonia, yeast and sugar needs to be added, and transfer what I've got mixed up into my large dyepots and fill up the excess room in the pots with warm water. Then I'll dye my scrap cotton that I turned a nasty brown/beige by boiling it in pokeberries two years ago, see how that does and take it from there.
None of the pre-reduced indigo instructions say anything about using the Yeast-Sugar-Ammonia fermentation method, but since apparently, the only difference between this stuff and natural indigo is its concentration and how fast it reacts, I don't see why it won't work. I'm just going to have a lot of this stuff that I need to exhaust. So if anybody I know out there has anything they'd like me to attempt to dye with indigo, fully aware that it might get completely screwed up in the process and results at this point are utterly unknown, now is the time to send it my way!
Friday, January 25, 2008
Indigo update and silliness...
Well, the vat is all set up... now it just has to sit for a few days at least... It all seemed to be doing what it was supposed to do... The indigo was weird though. I know it's not water soluble, but... knowing that and seeing what it does because it's not water soluble are two different things...
Anyhoo...
And it only took me taking it three times to get that too... LOL! First time, I got Peter Petrelli, which would be fine, except Peter was so annoyingly clueless this season... and then I got someone from The Office and I don't even watch The Office, so I had to take it again... :D
Anyhoo...

And it only took me taking it three times to get that too... LOL! First time, I got Peter Petrelli, which would be fine, except Peter was so annoyingly clueless this season... and then I got someone from The Office and I don't even watch The Office, so I had to take it again... :D
Thursday, January 24, 2008
My Indigo Vat...
I'm finally starting an indigo vat... Yay!!
I'm using the Indigo-Yeast-Ammonia Fermentation Method from EarthGuild (#3 at the bottom), which is where I got the indigo...
It gives instructions for fermenting a small amount of indigo (only one gallon of solution), which I thought was good to start with. I'm using a glass Anchor crock from Walmart (Anchor is one of my favorite glass companies - made in the USA and based in St. Pete, just across the bay from me; the company was a corporate sponsor of the school my dad worked at for 35+ years). They make a high quality, heavy glassware. I like it...
So far, I've got the yeast doing its thing in one Mason jar and the indigo and ammonia in another, both now sacrificed to the gods of dyeing. As soon as that stage is done in about an hour and a half, it's into the crock they go, where more water will be added and then it will all be left to sit and ferment...
Will keep posting about the progress...
Monday, January 21, 2008
Results of wooliness...
Well, I only really dyed a little sample green the other day. But I over-dyed some of the pokeberry dyed yarn that turned out blotchy. I used the recipe on the back of the food color box for "raspberry." Here's what I got:

It's actually more pink than this, but you get the idea. 4 ounces of a nice saturated mauve. Raspberry. I like it. I think it needs to be a beret actually... even though I really don't like Prince and think his music kinda sucks.
There's a bit of one skein where the color is a little too light. You can actually see it in the photo, so I'm dyeing that skein a little more to see if that will fix it. That skein overall is a little lighter than the other one anyway... I hope to at least get those little places dyed dark enough so that they blend in with everything else... We'll see... Now, I would love pattern suggestions if anyone happens to know of somewhere to find a pattern for a nice monotone beret...
In the meantime, I'm getting things together to *finally* set up an indigo vat. I need something to put the stuff in. Any suggestions for a good, stable fermenting container?
*********
Addendum: The re-dyeing fixed the uneven problem with that one skein, so yay!!
Saturday, January 19, 2008
Wooly things...
Been up to all sorts of little wooly things this week...
As I think I mentioned before, I want to make hats for a couple of pretty boys... Specifically, the ones on the CW's Supernatural - Jared Padalecki and Jensen Ackles... Who? Here are some icons that aren't mine to illustrate:
Jared as "Sam"


Jared as Jared

Jensen as "Dean"


Oddly, I have no icons of just Jensen as Jensen, so here's one more of Dean... just 'cuz...

So I spun up the samples of roving I got from Yarns Etc. There are several I think are possibilities, but I was really hoping for some more interesting blues and greens than what I got... So I'm thinking of getting something more plain and dying it with food coloring per knitty.com instructions.
I was going to use Kool Aid, but I got bit by the bug to dye something NOW this evening and couldn't go out searching for the sugar free stuff... But apparently, the food coloring is the same kind of chemical dyes that are also in Kool Aid, but in greater concentrations, cheaper and (alas) without the fruity smells to hide the vinegar. (It's okay... when I'm all done, I'll wash it with lavendar wool wash to keep away the moths and then it will smell yummy and not like vinegar.)
But I've just dyed a sample bit of my handspun green... a nice clear, bright green at that, neither yellowish nor blue-ish... in only about 20 minutes. I've taken pictures, but I can't seem to get the color to show up just right. I have a feeling that I can get the color a bit darker too, if I were more patient and let the wool soak longer, but I'm not patient... especially not for samples... it's bad of me... I know... But I think that's what I'll do for Jared's hat at least... A friend said that she thinks Jared would get a kick out of wearing a hat dyed with Kool Aid... She just thinks he's that kind of guy... And I kinda agree... But... It's still Kool-Aid though kinda... maybe?... He doesn't need to know that it isn't technically, does he? Since it's the exact same chemicals, right?... (Yeah, I'm ridiculous...)
I'm also thinking maybe of dyeing something for Jensen too now, maybe in a dark blue, or perhaps, for those who might know or care, do y'all think that the light blue-gray that I've been considering would suit him better? (see below)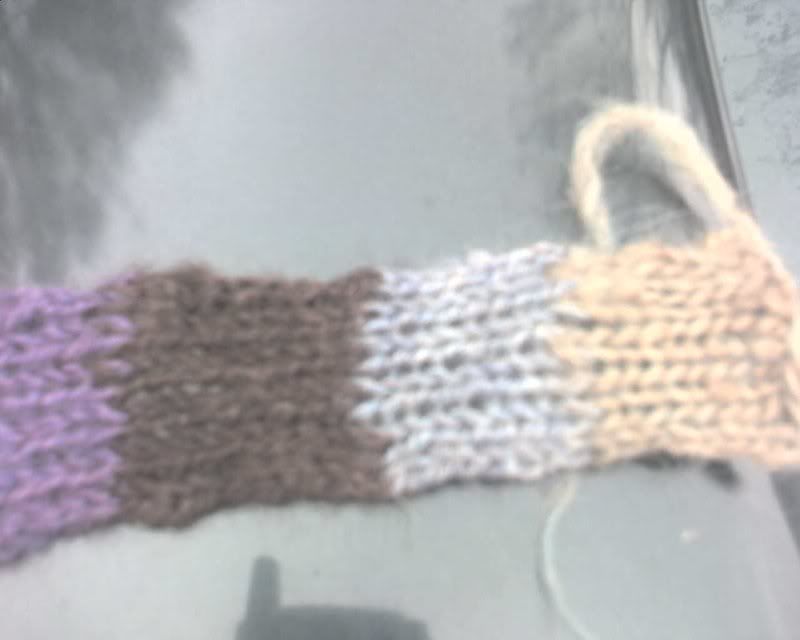 I'd like honest opinions on that because my zeal for trying out new craft techniques obsessively will take over if I'm not careful and my entire stash of hand-spun will be dyed before the end of the weekend if I don't watch myself. To get the right kind of dark-blue for Jensen though, I think I'll need to start with gray roving... (see the Kool-Aid dyed wool color chart - everything on the right side started as natural gray wool; see what a difference it makes?)
Even if I do dye something for Jensen as well, I'd still like to get some roving from Yarns Etc... As I said, I need something gray... I'm out of all the gray that I had, except for some that was dyed gray with God knows what and it's kinda coarse. I'll have to e-mail the lady at the store and ask if they've got any gray of which she didn't send a sample. After all, it's possible because I know I've gotten gray roving there before.
In other news: I want to make myself some of these Pedicure socks for myself. But I shall have to find another yarn of the same gauge because I'm allergic to some sort of chemical Patons uses with their wool yarn and that's the yarn the pattern calls for... It makes my hands itch, turn red and swell when I try to knit with it. Darn it... I'm thinking Rowan Pure Wool DK, which comes in some lovely colors... Hmmmm...
As I think I mentioned before, I want to make hats for a couple of pretty boys... Specifically, the ones on the CW's Supernatural - Jared Padalecki and Jensen Ackles... Who? Here are some icons that aren't mine to illustrate:
Jared as "Sam"
Jared as Jared
Jensen as "Dean"
Oddly, I have no icons of just Jensen as Jensen, so here's one more of Dean... just 'cuz...
So I spun up the samples of roving I got from Yarns Etc. There are several I think are possibilities, but I was really hoping for some more interesting blues and greens than what I got... So I'm thinking of getting something more plain and dying it with food coloring per knitty.com instructions.
I was going to use Kool Aid, but I got bit by the bug to dye something NOW this evening and couldn't go out searching for the sugar free stuff... But apparently, the food coloring is the same kind of chemical dyes that are also in Kool Aid, but in greater concentrations, cheaper and (alas) without the fruity smells to hide the vinegar. (It's okay... when I'm all done, I'll wash it with lavendar wool wash to keep away the moths and then it will smell yummy and not like vinegar.)
But I've just dyed a sample bit of my handspun green... a nice clear, bright green at that, neither yellowish nor blue-ish... in only about 20 minutes. I've taken pictures, but I can't seem to get the color to show up just right. I have a feeling that I can get the color a bit darker too, if I were more patient and let the wool soak longer, but I'm not patient... especially not for samples... it's bad of me... I know... But I think that's what I'll do for Jared's hat at least... A friend said that she thinks Jared would get a kick out of wearing a hat dyed with Kool Aid... She just thinks he's that kind of guy... And I kinda agree... But... It's still Kool-Aid though kinda... maybe?... He doesn't need to know that it isn't technically, does he? Since it's the exact same chemicals, right?... (Yeah, I'm ridiculous...)
I'm also thinking maybe of dyeing something for Jensen too now, maybe in a dark blue, or perhaps, for those who might know or care, do y'all think that the light blue-gray that I've been considering would suit him better? (see below)
I'd like honest opinions on that because my zeal for trying out new craft techniques obsessively will take over if I'm not careful and my entire stash of hand-spun will be dyed before the end of the weekend if I don't watch myself. To get the right kind of dark-blue for Jensen though, I think I'll need to start with gray roving... (see the Kool-Aid dyed wool color chart - everything on the right side started as natural gray wool; see what a difference it makes?)Even if I do dye something for Jensen as well, I'd still like to get some roving from Yarns Etc... As I said, I need something gray... I'm out of all the gray that I had, except for some that was dyed gray with God knows what and it's kinda coarse. I'll have to e-mail the lady at the store and ask if they've got any gray of which she didn't send a sample. After all, it's possible because I know I've gotten gray roving there before.
In other news: I want to make myself some of these Pedicure socks for myself. But I shall have to find another yarn of the same gauge because I'm allergic to some sort of chemical Patons uses with their wool yarn and that's the yarn the pattern calls for... It makes my hands itch, turn red and swell when I try to knit with it. Darn it... I'm thinking Rowan Pure Wool DK, which comes in some lovely colors... Hmmmm...
Subscribe to:
Posts (Atom)


